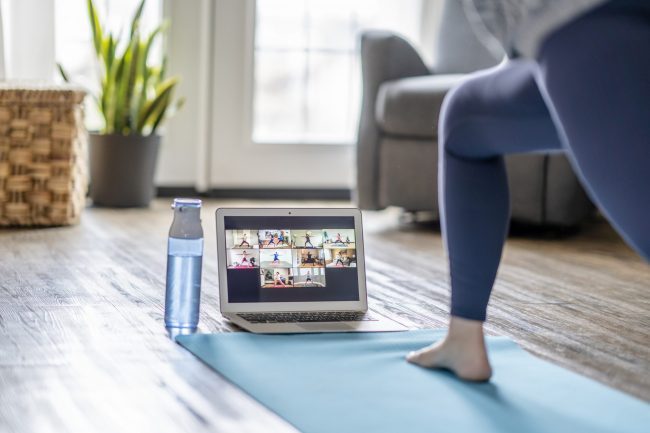
Exercise for Osteoarthritis: 8 Gems to Improve your Experience

As society ages overall Osteoarthritis (OA) will continue to be a bigger and bigger problem which will further burden the global health care system through medications, rehab, injections, and most notably – surgical procedures.
Exercise is a very popular low risk and low cost option to improve symptoms and function in people with OA. In this article I share 8 gems that I’ve learned that have improved my exercise prescription in people with OA of the hip and knee (particularly the knee).
Three disclaimers before we get started:
- First: bear in mind many people have OA who are painfree. Don’t just assume, especially if you’re a layperson reading this, that OA is the cause of you or your clients’ pain. Get it comprehensively checked out.
- Second: as with everything in my articles – nothing works for everyone.
- Third: this is pretty much exclusively anecdotal
Also before we get started – if you’re interested in learning more about exercise prescription for the aging adults, please check out this Masterclass by Dr. Mariana Wingood.
With that out of the way – time to get to the gems.
1 – Get ‘em on the bike
There are many clients with OA whom I’ve worked with who may be a bit stiff or sore starting an exercise session but after 5-10 minutes on a recumbent bike they’re feeling and moving much better. I prefer a recumbent bike compared to an upright bike due to the ease of getting on/off the bike and having a more comfortable seat to sit on. I also prefer doing manual therapy in someone who’s warmed up as opposed to someone who’s not.

2 – Use repeated movements
I’ve found that a lot of people with Knee OA respond well to repeated knee extensions and/or repeated knee flexions (with or without overpressure depending on response). As with the bike, sometimes warming up the knee and getting it moving can help a lot. It can also help to decrease the fear of movement which can be present in this demographic. Plus, if they respond well, it can give them some easy exercises to fit into the day that can also potentially address a common complaint of stiffness (particularly with prolonged sitting) in the joint.
3 – Progressive sit to stands and box squats are wonderful!
Many people I have worked with who have knee or hip OA have pain and/or difficulty squatting. In situations like this, a sit to stand or a box squat to an elevated surface (while still keeping the feet flat on the floor) can be helpful with training the lower body in a (in almost all cases) less painful manner. As the client becomes more comfortable with the movements, which sometimes happens mid-set, you can start to decrease the height of the surface you’re using.
I usually prefer box squats, just to emphasize the posterior chain, but in some cases I will choose sit to stands if clients are having trouble picking up the box squat technique.
4 – Prioritize the posterior chain
I like posterior chain exercises (such as bridges and hip thrust variations) for people with OA, particularly of the knee, as they are usually tolerated better than exercises involving a lot of knee flexion/forward knee translation. They also work muscles that are quite often underdeveloped in a lot of people.
Side note: these next three tips apply to exercising at home where you may not have access to a lot of weights (if at all). While I love seeing pictures & videos of older clients lifting barbells, I understand that not everyone has access to those things. Gym memberships may not always be an option for older clients who…
- Live in a more isolated community
- Lack transportation
- Live in an area where gyms are shut down due to restrictions
- And/or don’t feel comfortable exercising in a gym
5 – Stagger it out
Single leg movements (i.e. rdl, bridge, hip thrust, split squat, lunge) have become extremely popular in the last couple years during gym shutdowns as they provide great training effects with minimal to no external resistance needed. The problem is that going from a bilateral bodyweight/goblet squat to a split squat or lunge can be a big jump for some older clients.
I have more recently begun to use staggered stance movements (i.e. staggered stance sit to stand, bridges and rdls) with one foot slightly in front of the other to serve as a “bridge” (no pun intended) between bilateral and unilateral work. If you have a client who doesn’t have access to weights, can do >15 reps easily on a sit to stand or do a goblet squat but can’t do a split squat, a staggered stance may be the way to go.
When can we do unilateral exercises?
I’ve found that being able to go up and down stairs normally without giving way and without using a railing is a good indicator of when to start true unilateral exercises.
For quad dominant exercises I like the following progression once a client can do stairs normally:
- Step ups/stairs (normal stair height)
- Lateral stepups (again normal stair height)
- Split squats with support (i.e. hand on counter). From here you can add weight or go to
- Front Foot Elevated (on normal stair) Split Squat
- Rear Foot Elevated Split Ssquat (heel elevated first on normal step if possible and then on a bench or couch).
For hip dominant exercises I use the following progression:
- Regular glute bridge
- Glute bridge with arms across chest
- Staggered Glute Bridge
- Single Leg Bridge OR Double Leg Hip Thrust (if clients can do them comfortably)
- Single Leg Hip Thrust
6 – Use household implements for external resistance
Things like backpacks full of weight, water jugs, and grocery bags can be used as a “MacGyver” option to help add load. Is it as good as having access to a gym? No. Is it better than nothing? Yes.
7 – Emphasize slow eccentric tempo
Doing exercises with a slow eccentric tempo can also be helpful for opening the knees up, improving strength in functional tasks (i.e. getting on/off the ground, getting in/out of a chair), and progressing the difficulty of an exercise without adding external load.
The only disclaimer I have with these is implement them cautiously and educate clients that there may be some added muscle soreness afterwards in the early stages of doing these.
I discuss tips 5-7 in a brief video here:
8 – Create a positive experience with movement
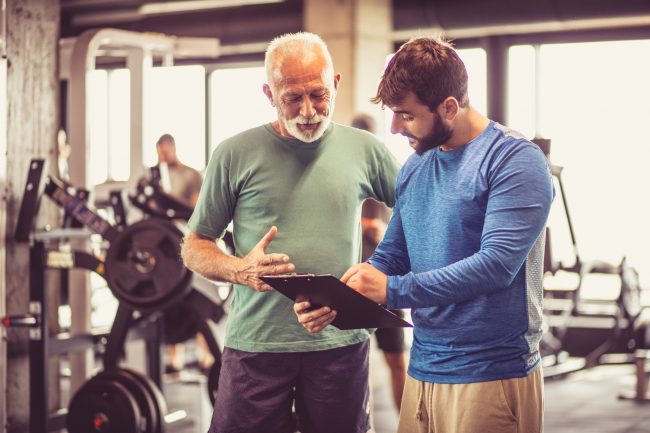
This applies to any demographic you work with – but for an older population who may never have exercised before, may have multiple health conditions on the go at once, and may not be confident with exercise; especially while in pain; it’s critical to create a positive experience with movement. What does that mean? To me it comes down to several components:
First – setting clients up for success
I’m going to sound a bit ageist with this component but coaching and cueing exercises in a 16-39 year old who plays sports and works out is, on average, (yes there are exceptions) far easier than coaching an elderly client who may have never touched a weight or played organized sports in his/her life. With that in mind, a big component is giving clients exercises that have fairly low learning curves and are easy to learn and progress in. Examples of these include:
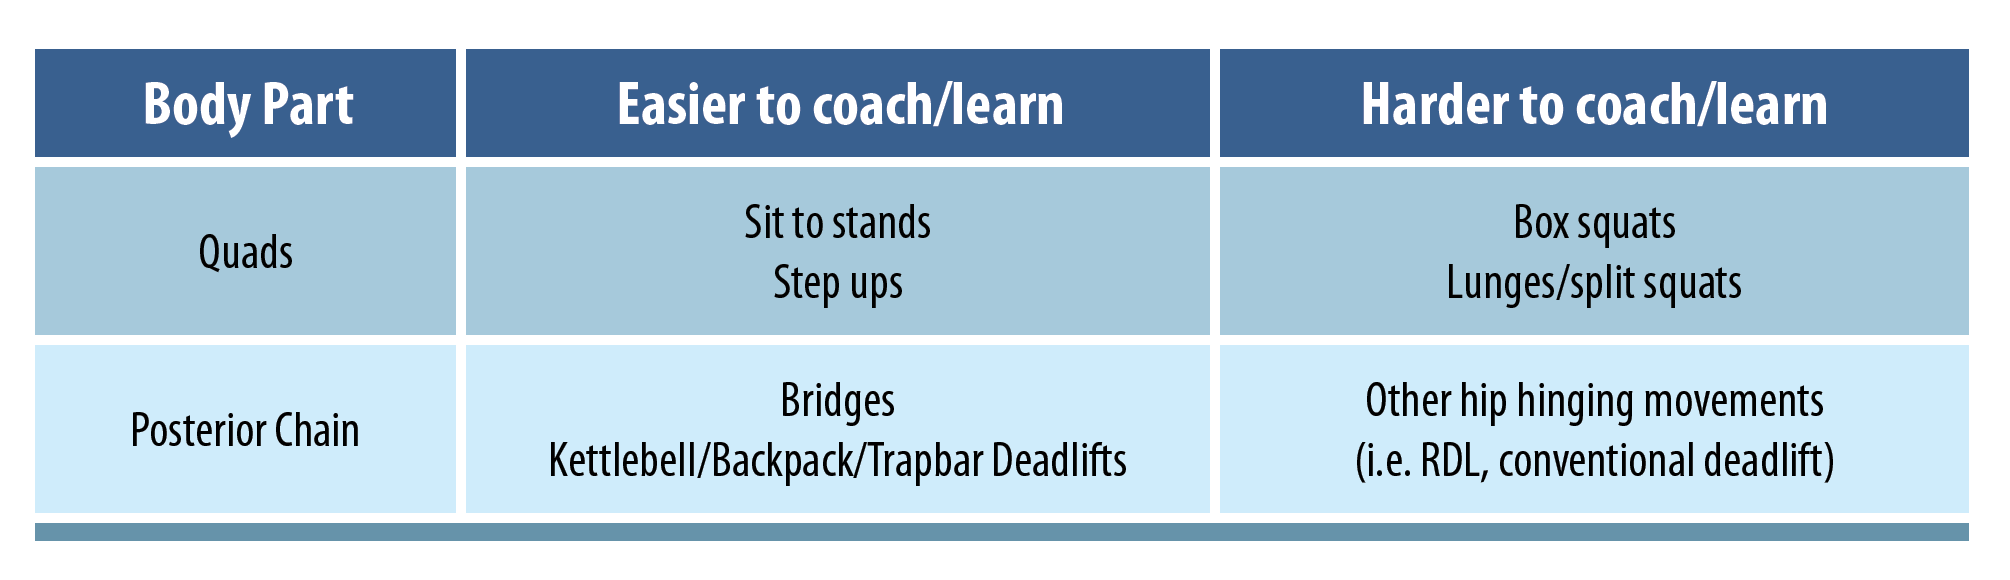
You don’t need to underload clients with these either, as you can add weight and/or progress the difficulty of the exercises if they do well with them. I’d rather pick an exercise that’s easier to coach and learn than something that the client struggles to learn, that requires A LOT of time to learn properly, and thus leads to the client having a bad experience. Unless your client has a goal of Powerlifting, Strongman, Olympic Lifting or Crossfit, exercises are just a means to an end.
Second – not overcoaching
Anyone who knows me knows that I’m a stickler for form – that’s the Stu McGill guy and the semi-retired powerlifter in me. That said, for people who are newer to exercise, are less coordinated, and may be doing lower level activities, I’m fine being a touch more lenient with form (as long as it’s not painful or putting clients at risk of injury) and spreading out my coaching and cueing over a much greater period than I would use for other clients. This falls in with the above idea of setting clients up for success.
Third – making sure the client is confident with the exercises given
I have lost clients in the past by giving them exercises and movements that, while everyone here would agree are certainly safe, appeared unsafe by the client’s standards and as such the client was not confident in doing them.
If I get the vibe that a client is not confident doing exercise I will ask them “on a scale of 0-5 where 5 means “no problem doing that exercise” and 0 means “no way”, how confident are you doing that exercise?” If the answer I get isn’t at least a 3, I will dial it back. While I don’t want to chronically underload, having them start gently and progress over time is far better than nothing and sometimes you need to meet clients where they’re at.
Wrapping up
Give these tips a try – and let me know how these help your clients with hip and knee OA. As always – thanks for reading. For more tips on prescribing exercise in the aging adult, check out the masterclass by Dr. Marianna Wingood here.
Want to learn how to optimise your exercise prescription for older adults?
Dr Mariana Wingood has done a Masterclass lecture series for us on:
“Exercise prescription for aging adults”
You can try Masterclass for FREE now with our 7-day trial!

Don’t forget to share this blog!
Related blogs
View allElevate Your Physio Knowledge Every Month!
Get free blogs, infographics, research reviews, podcasts & more.
By entering your email, you agree to receive emails from Physio Network who will send emails according to their privacy policy.
Leave a comment
If you have a question, suggestion or a link to some related research, share below!